Account Basics
All information about your account can be found here; from how to change your password to securing
- API tokens
- How to view your login sessions
- Don't recognise a login session
- Why can't I login to Pascal
- How to change your login password
- How to change your interface language
- How to enable multifactor authentication for your account
- How to change your notification and email preferences
- Multiple Pascal environments
API tokens
This documentation, including images, videos and text, is accurate as of Version 5.12 of Pascal.
We strive to keep our documentation up to date with each release to ensure it remains a reliable resource for our users. However, given the dynamic nature of our software development, there might be instances where changes introduced in subsequent versions are not immediately reflected in this documentation. We encourage users to refer to the latest release notes and to use the feedback mechanism for any discrepancies or requests for clarification.
API tokens are user specific, personal tokens that can be generated in Pascal. If you would like to learn more on how the public API can be used, you can find more information in the Public API article.
API tokens can be viewed and added in the API tokens section in your Account Settings.
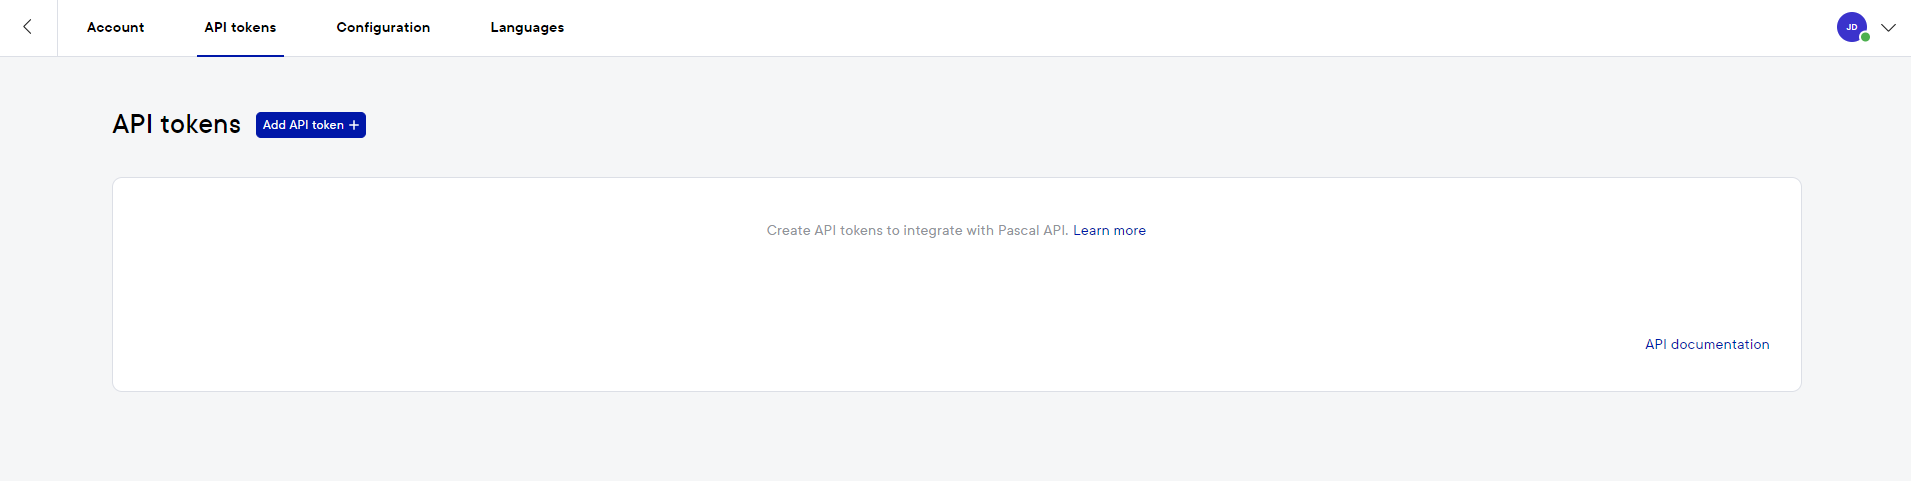
The following steps can be used to create a new API token
- Click on the Add API token button in the API tokens card.
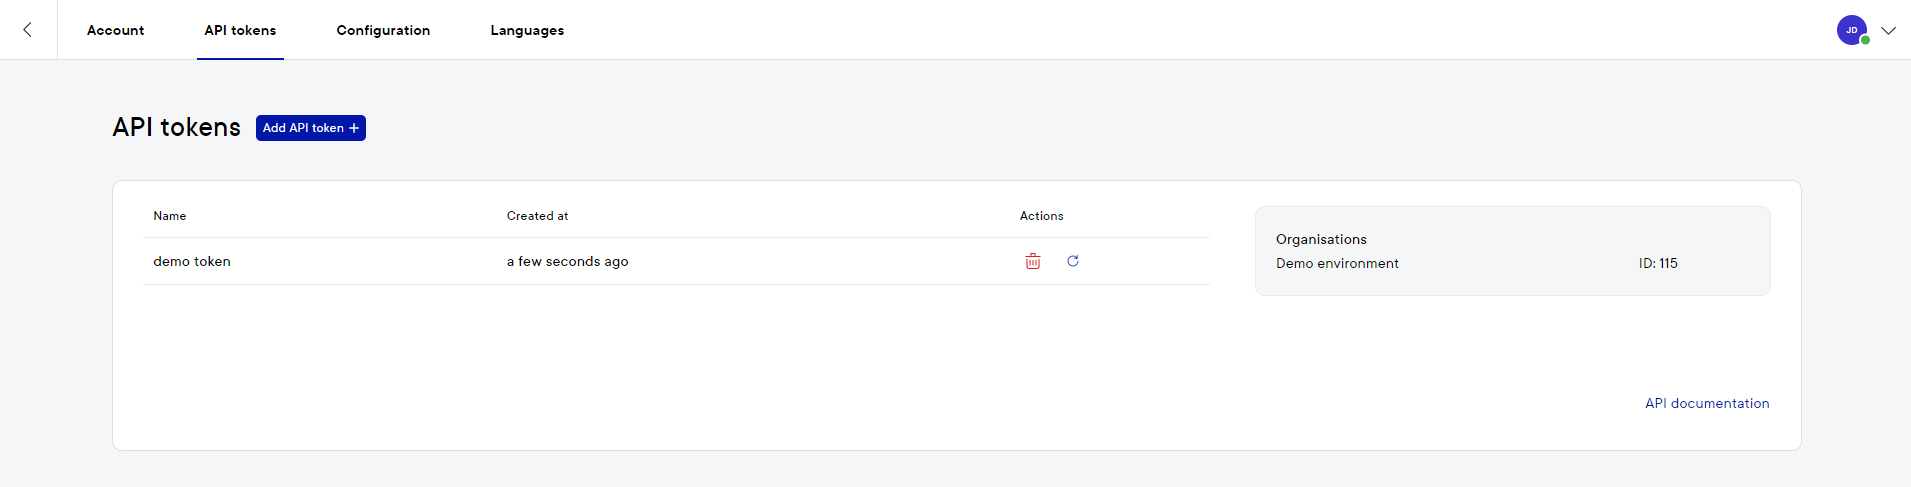
- Enter a token name in the presented popup and press the Create button.
- A new popup will appear with the token. You should save this token well, as this token cannot be viewed again after closing the popup.
- After the token is saved, you can press the Confirm button.
Tokens can be removed by selecting the delete button. Or you can generate a new token by selecting the button beside it.
How to view your login sessions
This documentation, including images, videos and text, is accurate as of Version 5.12 of Pascal.
We strive to keep our documentation up to date with each release to ensure it remains a reliable resource for our users. However, given the dynamic nature of our software development, there might be instances where changes introduced in subsequent versions are not immediately reflected in this documentation. We encourage users to refer to the latest release notes and to use the feedback mechanism for any discrepancies or requests for clarification.
Follow the description below to view your recent login sessions or to make a report of these sessions.
Viewing your login sessions
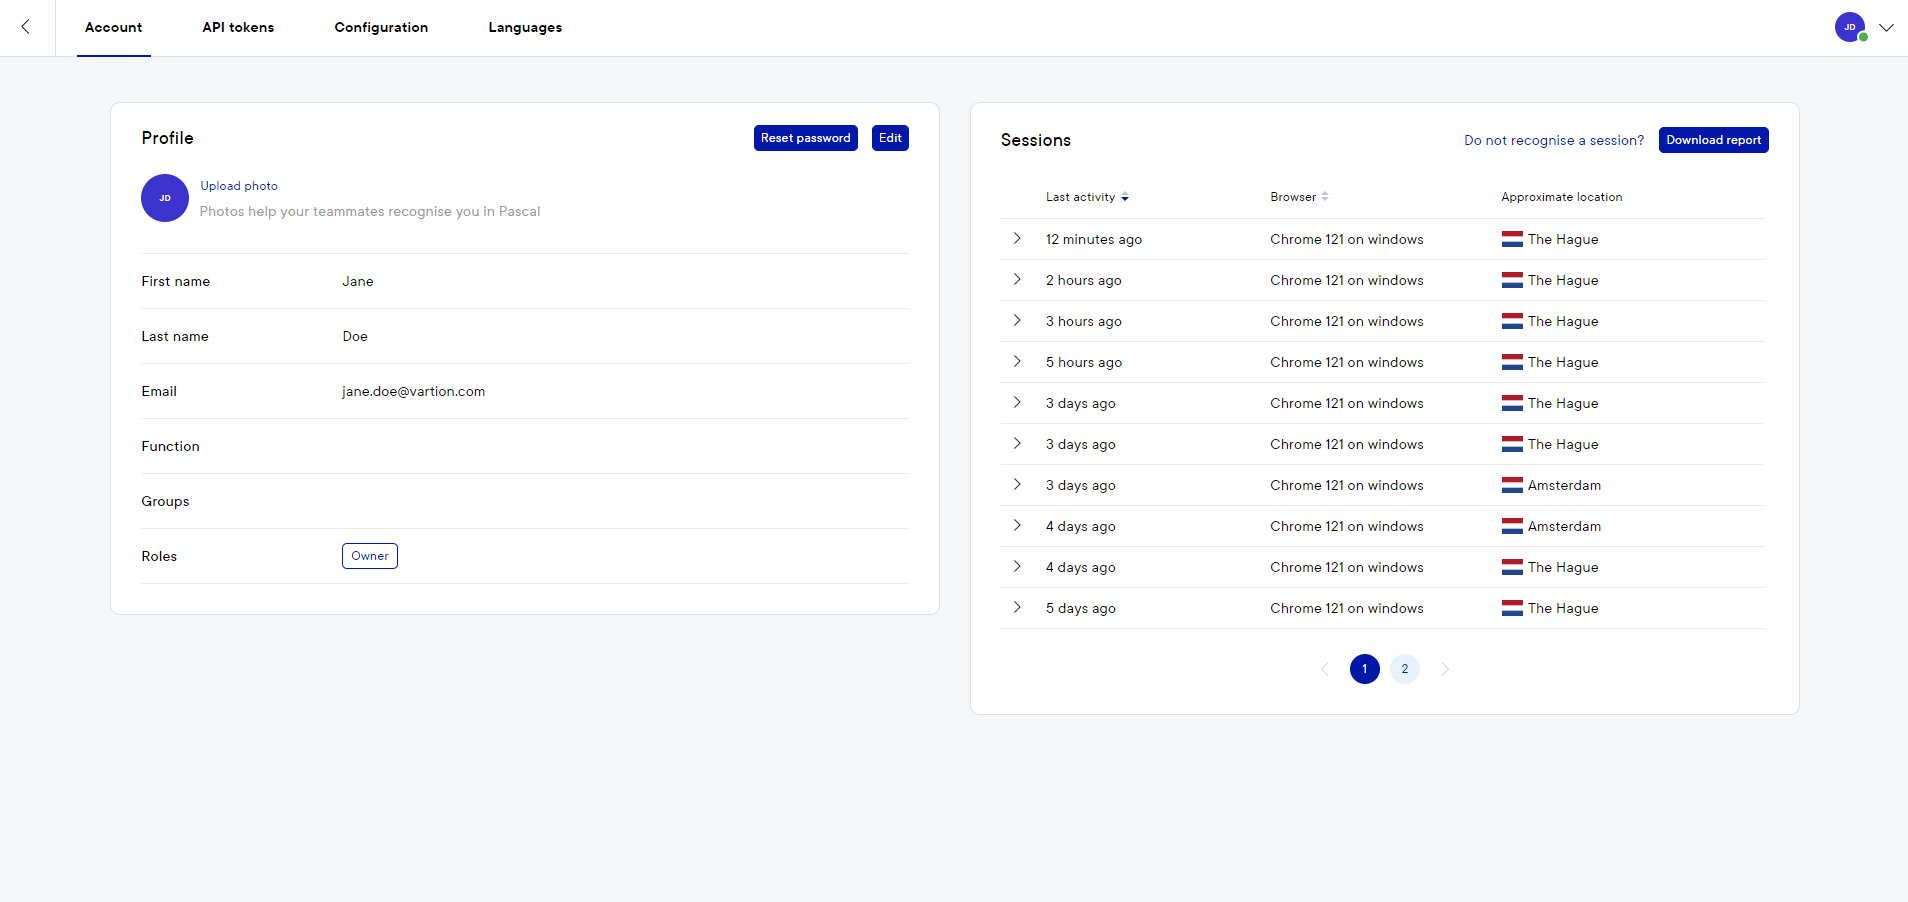
You can see the previous sessions of your account in Pascal in the Account page in your Account settings. On the right side of this page, the previous sessions are displayed. You can check this information to make sure no one else has signed into your account. You can also download a session report of your previous sessions.
- Click on your initials in the top right corner.
- Select Account settings.
- Navigate to the Account tab.
- Select the Download report button in the Sessions card on the right.
- Choose which information you would like to be included in the report. The content Overview and/or Sessions can be excluded and included from the report by selecting or deselecting them in the top field.
- A comment can be included in the report and the filename can be changed as desired.
- The report can be downloaded directly with the Download button or sent to the email address designated to your account with the Email button.
Don't recognise a login session
This documentation, including images, videos and text, is accurate as of Version 5.12 of Pascal.
We strive to keep our documentation up to date with each release to ensure it remains a reliable resource for our users. However, given the dynamic nature of our software development, there might be instances where changes introduced in subsequent versions are not immediately reflected in this documentation. We encourage users to refer to the latest release notes and to use the feedback mechanism for any discrepancies or requests for clarification.
If you don't recognise a login session in your account overview follow the steps below.
Viewing your login sessions
You can see the previous sessions of your account in Pascal in the Account page in your Account settings. On the right side of this page, the previous sessions are displayed. You can check this information to make sure no one else has signed into your account.
Secure your account if you see an unfamiliar login session
You can change your password to secure your account if you do not recognise displayed login sessions.
- Click on your initials in the top right corner.
- Open the Account settings.
- Navigate to the Account tab.
- Reset your password by clicking the Reset password button in the Profile card.
- Type in your current password and fill in a new, stronger password in the second and third field.
- Select the Reset button and then the Confirm button.
After changing your password you are logged out in all places where you were logged in except the one where you have changed the password.
If you have reason to believe someone else is using your account, please take action to prevent them from using your account in the future
You can look for these signs that someone else is using your account:
- You don't recognise the location a session was logged.
- You weren't at a location at the time listed.
- You don't remember using your account at a certain date and time.
- You see a different browser (like Safari, Firefox, Edge and Chrome) than the one you normally use.
If you notice someone else might be using your account, you can secure your account by following the steps in Secure your account.
Why can't I login to Pascal
This documentation, including images, videos and text, is accurate as of Version 5.12 of Pascal.
We strive to keep our documentation up to date with each release to ensure it remains a reliable resource for our users. However, given the dynamic nature of our software development, there might be instances where changes introduced in subsequent versions are not immediately reflected in this documentation. We encourage users to refer to the latest release notes and to use the feedback mechanism for any discrepancies or requests for clarification.
If you have trouble loging into Pascal, please ensure you are using the correct email address and password for your account.
If you have forgotten your password or logging in is not working:
- Click Forgot password? on the login page of Pascal.
- Enter the email address that is linked to your account.
If the provided email exists within Pascal, you will receive a password reset link at your email address within a few minutes. Follow the instructions in the email to reset your password. If you do not receive a password reset email, please check you spam folder.
If the email is not in the spam folder either, it appears there is no (active) account linked to the email address that was provided. Please contact a colleague who is an owner or admin in your Pascal environment, to verify the status of your account. If needed, they can reactivate or add your account.
How to change your login password
This documentation, including images, videos and text, is accurate as of Version 5.12 of Pascal.
We strive to keep our documentation up to date with each release to ensure it remains a reliable resource for our users. However, given the dynamic nature of our software development, there might be instances where changes introduced in subsequent versions are not immediately reflected in this documentation. We encourage users to refer to the latest release notes and to use the feedback mechanism for any discrepancies or requests for clarification.
To change your login password, follow the below steps:
- Click on your initials in the top right corner.
- Select Account settings.
- Navigate to the Account tab.
- Select the Reset password button in the Profile card on the left.
- Type in your current password and fill in a new, strong password in the second and third field.
- Select the Reset button and then the Confirm button.
After changing your password, you are logged out in all places where you were logged in except the session where you have changed the password.
How to change your interface language
This documentation, including images, videos and text, is accurate as of Version 5.12 of Pascal.
We strive to keep our documentation up to date with each release to ensure it remains a reliable resource for our users. However, given the dynamic nature of our software development, there might be instances where changes introduced in subsequent versions are not immediately reflected in this documentation. We encourage users to refer to the latest release notes and to use the feedback mechanism for any discrepancies or requests for clarification.
To change you interface settings, follow the below steps:
- Click on your initials in the top right corner.
- Open the Account settings.
- Navigate to the Languages tab.
The default of the interface of Pascal is English (UK). This can be changed by selecting a different language in the dropdown menu that contains all the languages we currently provide. Pascal will automatically and immediately change its interface to the language that is chosen.
How to enable multifactor authentication for your account
This documentation, including images, videos and text, is accurate as of Version 5.12 of Pascal.
We strive to keep our documentation up to date with each release to ensure it remains a reliable resource for our users. However, given the dynamic nature of our software development, there might be instances where changes introduced in subsequent versions are not immediately reflected in this documentation. We encourage users to refer to the latest release notes and to use the feedback mechanism for any discrepancies or requests for clarification.
To enable multifactor authentication, follow the below steps:
- Click on your initials in the top right corner.
- Open the Account settings.
- Navigate to the Configuration tab.
- Turn on the option which states Require multi-factor authentication via email. Changing this setting is immediately changed, and can be turned off anytime.
When multi-factor authentication is enabled, a verification code will need to be filled in when trying to log in for the first time on a new device or IP address. The multi-factor authentication verification code will then be asked once a month for existing IP addresses and devices. The verification code will be sent to the email address that is connected to Pascal. The verification code can only be used once. The next time you need to fill in your verification code a new email is sent.

How to change your notification and email preferences
This documentation, including images, videos and text, is accurate as of Version 5.12 of Pascal.
We strive to keep our documentation up to date with each release to ensure it remains a reliable resource for our users. However, given the dynamic nature of our software development, there might be instances where changes introduced in subsequent versions are not immediately reflected in this documentation. We encourage users to refer to the latest release notes and to use the feedback mechanism for any discrepancies or requests for clarification.
To change your interface settings, follow the below steps:
- Click on your initials in the top right corner.
- Open the Account settings.
- Navigate to the Configuration tab.
The Configuration page is divided into four sections; General, Interface, Monitoring and Notifications.
General
Default search confidence: The default search confidence has two options: Relative and Exact. This will modify the default option whenever making a search. The default is Relative.
Update notifications via email: Pascal sends an email notification regarding updates to the application. The default for this is Yes.
Require multi-factor authentication via email: When this is turned on a verification code is sent to the email address registered with the Pascal user account during every login on a new device or with a new IP address. The multi-factor authentication verification code will only be required once a month on IP addresses used with Pascal before and every time logging in from a new IP address. The verification code sent to the email address can only be used once.
Interface
Date format: Depending on you preference the date format can be altered.
Monitoring
Frequency of reports: Reports are made regarding your monitored cases. These can be sent to you daily or weekly.
Receive reports on: You can choose on which day of the week you would like to receive your report. The default is Monday
Receive reports via email: The reports of monitoring can be sent to your email, which will link you to the monitoring reports page. The default is No.
Receive reports without findings: It can occur that no new information is found within the time period of making a monitoring report. You can choose whether you still want to receive these reports. The default is No.
Notifications
Show updated hits in notifications: In monitored cases, hits can be updated which are already included or excluded. When this happens, Pascal can send you a notification about the change if you choose to. You can choose whether you want a notification of all risk changes, different changes in risk levels or no notifications at all. The default is Don't notify.
Multiple Pascal environments
This documentation, including images, videos and text, is accurate as of Version 5.12 of Pascal.
We strive to keep our documentation up to date with each release to ensure it remains a reliable resource for our users. However, given the dynamic nature of our software development, there might be instances where changes introduced in subsequent versions are not immediately reflected in this documentation. We encourage users to refer to the latest release notes and to use the feedback mechanism for any discrepancies or requests for clarification.
If your email address is used for multiple accounts across several Pascal environments (called organisations in the application), you will have an option in the menu below your initials to change to the other environment. When selecting the other environment there, you will be taken to the other environment immediately. The environment you are active in, will be displayed in the top right corner, besides your initials.
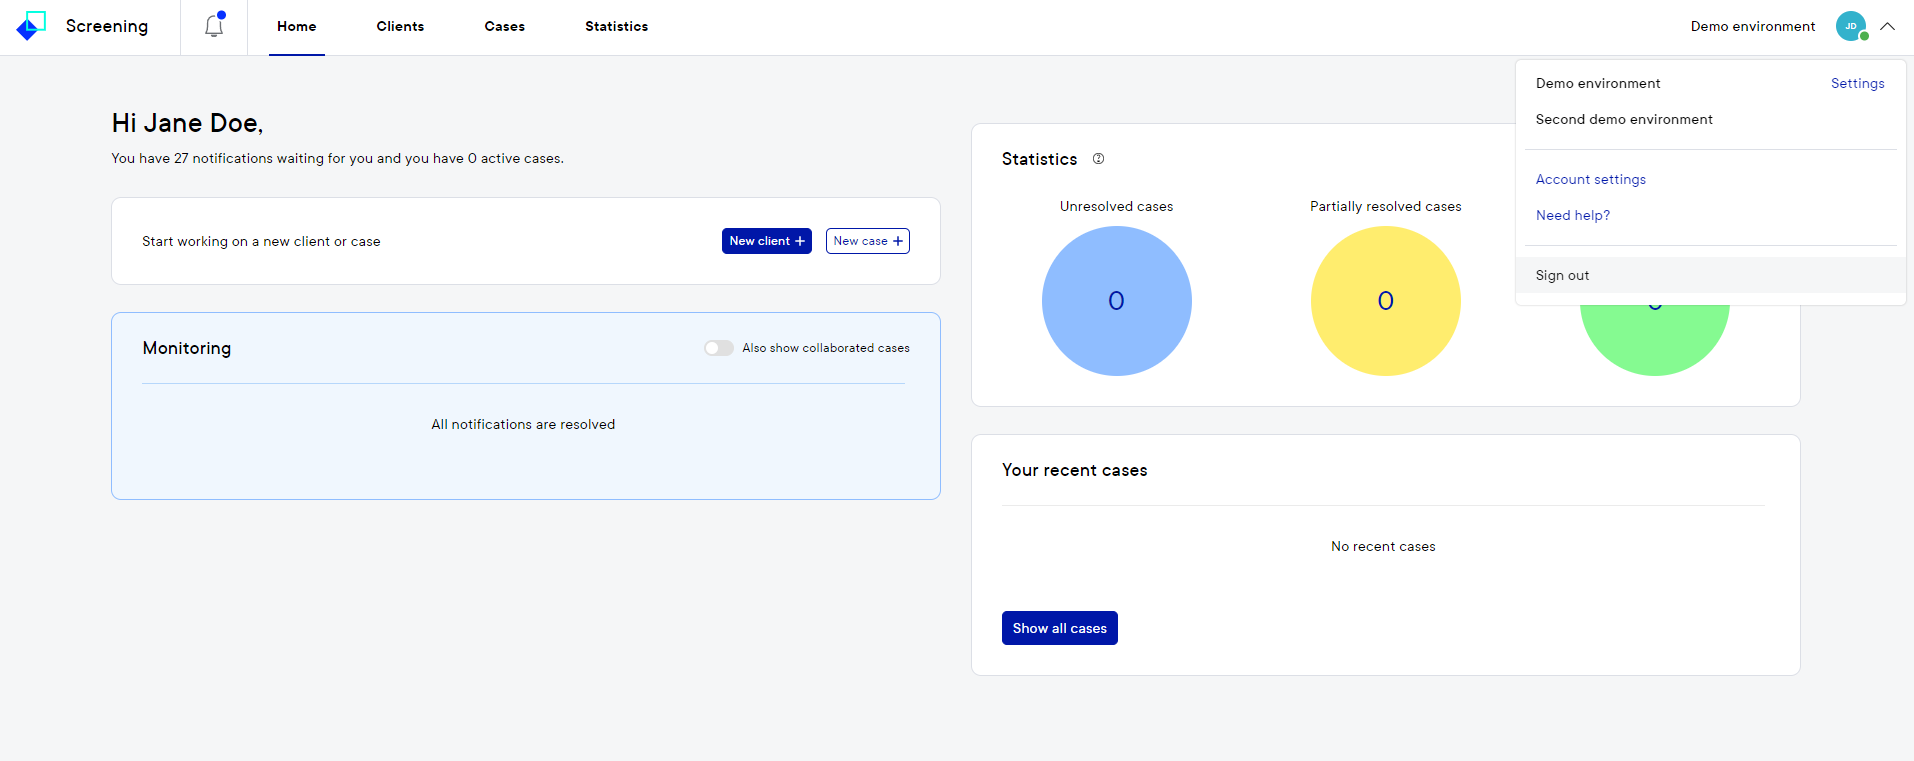
The personal settings you have set up in the Configuration and Languages tabs in your Account settings are the same for your account in all organisations.