Clients
Grouping cases and clients together in clients and how to manage them.
- How to create a client
- How to edit client information
- How to link cases or clients to a client
- How to create and customise client reports
- How to delete a client
How to create a client
This documentation, including images, videos and text, is accurate as of Version 5.12 of Pascal.
We strive to keep our documentation up to date with each release to ensure it remains a reliable resource for our users. However, given the dynamic nature of our software development, there might be instances where changes introduced in subsequent versions are not immediately reflected in this documentation. We encourage users to refer to the latest release notes and to use the feedback mechanism for any discrepancies or requests for clarification.
Clients are used to group cases together which are related to each other. This will give a clear overview over the related cases and the work left to do.
A new client can be created from the Home page, and the Clients page. On either page, select the New client button to initiate the creation of a new client. Now, a new dialog opens, where you can fill in the client's name and an optional description can be provided. After this information is provided, you can select the Create client button. A new dialog will open where you can search for existing cases or create a new one.
If you type in a case name that already exists in your environment, the case will show up and you can select it to add the already existing case to the client you created.
If you type in a case name that does not exist in your environment, no cases will show up to add to the client. However, you can select the Create new case button to create the case to add to the client. A new dialog will show up where more information about the case can be filled in. After the case has been created, it is highlighted in blue to be added to the client you are creating. More existing and new cases can be added at once to the new client. However, cases can also always be added to the client from the client view.
How to edit client information
This documentation, including images, videos and text, is accurate as of Version 5.12 of Pascal.
We strive to keep our documentation up to date with each release to ensure it remains a reliable resource for our users. However, given the dynamic nature of our software development, there might be instances where changes introduced in subsequent versions are not immediately reflected in this documentation. We encourage users to refer to the latest release notes and to use the feedback mechanism for any discrepancies or requests for clarification.
An existing client can be modified with updated information if desired. The description of the client can be changed, the name of the client can be updated, and cases can be added or removed from the client.
Updating client details
To change the name or description of a client:
Editing linked cases
Linked cases are displayed at the bottom of the client overview in the cases card. The following steps can be used to link an existing case to the client:
- On the client's page, select the Add case button in the cases card.
- In the Add case dialog that appeared, the name of a case can be searched for by filling the case name in the text field.
- All cases which match the filled in search terms, will show up in the dialog below the text field.
- Select the case you would like to add to the client.
- Click on the Add cases button at the bottom of the dialog to confirm the addition of the selected case to the client.
The following steps can be used to link a new case to the client:
- On the client's page, select the Add case button in the cases card.
- Fill in the new case name in the text field, in the Add case dialog that just appeared.
- Click on the Create new case. This will open the case creation dialog.
- Here, you can fill in all information known about the person or entity you want to search on.
- After all information about the case has been filled in, select the Create case button at the bottom of the dialog. You are taken back to the dialog to add cases to the client.
- Click on the Add cases button at the bottom of the dialog to confirm the addition of the selected case to the client.
Removing linked cases
In the cases card at the bottom of the client page, all cases are presented which are linked to the client. If you would like to remove one of the cases linked to this client. You can open the case by selecting the row in the cases table. On the left side of the case's overview, you can select the Unlink button next to the client name the case is linked to that you would like to remove.
How to link cases or clients to a client
This documentation, including images, videos and text, is accurate as of Version 6.5 of Pascal.
We strive to keep our documentation up to date with each release to ensure it remains a reliable resource for our users. However, given the dynamic nature of our software development, there might be instances where changes introduced in subsequent versions are not immediately reflected in this documentation. We encourage users to refer to the latest release notes and to use the feedback mechanism for any discrepancies or requests for clarification.
To group similar cases or clients together in a client, you can link them to a client. With this approach, all cases or clients linked to a single client are grouped together in one overview.
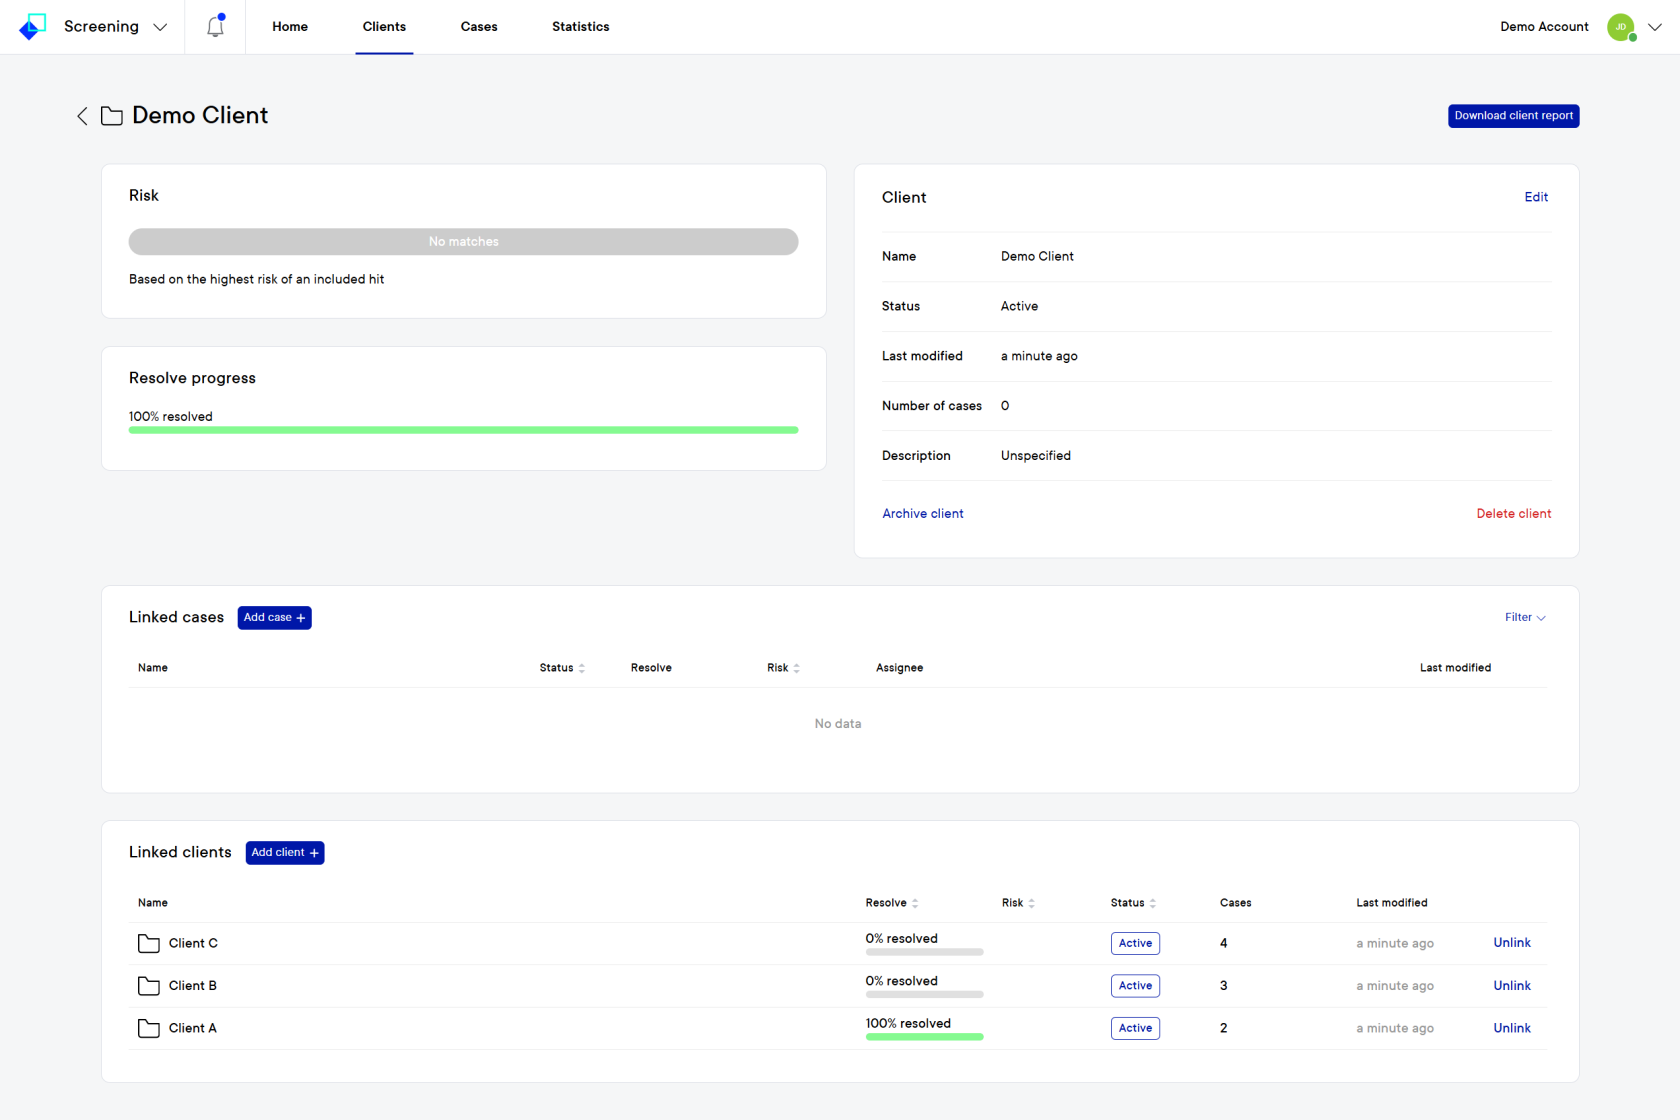
To add a case to a client, you can follow the below steps:
To add a client to a client, you can follow the below steps:
How to create and customise client reports
This documentation, including images, videos and text, is accurate as of Version 5.12 of Pascal.
We strive to keep our documentation up to date with each release to ensure it remains a reliable resource for our users. However, given the dynamic nature of our software development, there might be instances where changes introduced in subsequent versions are not immediately reflected in this documentation. We encourage users to refer to the latest release notes and to use the feedback mechanism for any discrepancies or requests for clarification.
Client reports can be downloaded to get an overview of all cases linked to this specific client and get some general information on these cases.
The information provided in a client report can include:
- The name and id of cases linked to the client.
- The input information of each individual linked case.
- The key findings of each individual linked case.
You can download a client report by following the steps below:
How to delete a client
This documentation, including images, videos and text, is accurate as of Version 5.12 of Pascal.
We strive to keep our documentation up to date with each release to ensure it remains a reliable resource for our users. However, given the dynamic nature of our software development, there might be instances where changes introduced in subsequent versions are not immediately reflected in this documentation. We encourage users to refer to the latest release notes and to use the feedback mechanism for any discrepancies or requests for clarification.
A client can be used to group certain cases together in one folder. If the client folder isn't needed anymore, it can be easily deleted with or without deleting the cases attached to it.
You can delete a client by:
- Going to the Clients tab.
- Select the client you would like to delete.
- Click on the red Delete client button in the Client card on the right of the overview.
- A popup will appear which asks you if you would also like to delete the linked cases to this client. Turn this option on if you would also like to delete the associated cases. Then select the Confirm button.
- The client is now deleted, and the cases linked to it have been deleted if this option was chosen. If this option was not chosen, the cases can still be found in the Cases tab, only with one linked client less.