HubSpot
HubSpot integration with Pascal and how to use the Pascal app from within HubSpot.
- Getting started - HubSpot
- Setup guide - HubSpot
- How to set up HubSpot integration from within Pascal
- How other users can join your Pascal environment
- How to create a KYC check from within HubSpot
- How the KYC risk works in HubSpot checks
- Dive into KYC results
- Review KYC reports
Getting started - HubSpot
This documentation, including images, videos and text, is accurate as of Version 5.12 of Pascal.
We strive to keep our documentation up to date with each release to ensure it remains a reliable resource for our users. However, given the dynamic nature of our software development, there might be instances where changes introduced in subsequent versions are not immediately reflected in this documentation. We encourage users to refer to the latest release notes and to use the feedback mechanism for any discrepancies or requests for clarification.
Pascal is the KYC/AML screening solution that integrates seamlessly with HubSpot. With Pascal, you can perform risk-based KYC and KYB screenings on your contacts and companies, using over 700 million global data sources on Sanctions, PEPs and Adverse media. Pascal enables you to monitor your clients' status continuously and automatically from your HubSpot account, saving you time and hassle.
Before you start
Contact card
One of the ways to improve your experience with Pascal, is to add the Country/Region field to the Create contact form and make it a required field. When creating a new contact, use the contact's first and last name as they appear on the passport or other official documents.
This will help Pascal provide you with more relevant and accurate feedback based on the contact's name and location.

Company card
One of the important steps in setting up the Create company form is to add the Country/Region field. The company card will then show where the company is registered. Making this a mandatory field will help Pascal provide you with better and more accurate feedback based on the company's location.
When creating a new contact, use the legal name of the company as it appears on official documents. Do not rely on the company domain to fill in this field, as it might not match their correct legal name!

Screening
KYC Check pane
Information in the KYC Check card helps you assess the risk level of a new contact in HubSpot. It will show up on the right side of the contact or company page after you have created the entity you want to do business with.

After a few minutes or after pressing the "Refresh (search can take up to 2 minutes)" button, one of the following three options will present itself.

1. If you see a red circle next to Alerts, it means that some of the data you entered has triggered high risk alerts. These alerts indicate possible errors, fraud, or compliance issues that require your immediate attention. Please review the alerts and take the appropriate actions to resolve them as soon as possible.

2. If you see a blue circle next to Alerts, it means some alerts, which are not high risk, have been detected based on your input. You may need to take action to resolve these alerts or prevent them from escalating.

3. If you see a check mark next to Alerts, it means no alerts have been detected based on your input. No further action is needed.
Alert handling
To handle alerts efficiently, you need to access the KYC Check card in HubSpot. There, you can find the contact or company name at the top of the card and click on it.

This will open a new window in Pascal, where you have the option to explore the findings and evaluate the outcomes. To unlock all the features, including the ability to monitor the contact or company, you need to create a full case by clicking on Turn info a full case.

Reviewing and resolving the found alerts can be done when the case is converted to a full case. After all the alerts of a contact or company have been reviewed, the status can be changed to monitored or archived.

When the status is changed to monitored, the contact or company will be automatically monitored for new alerts. These new alerts will also be visible in the KYC Check card in HubSpot.

To access the product documentation and tutorials for the Pascal application, which explain its features and capabilities in detail, you can click on the lifebuoy icon on the left side of the page.

With these documents and tutorials, you will learn how to use the Pascal application effectively and explore its various features, such as evaluating and resolving alerts.
Setup guide - HubSpot
This documentation, including images, videos and text, is accurate as of Version 5.12 of Pascal.
We strive to keep our documentation up to date with each release to ensure it remains a reliable resource for our users. However, given the dynamic nature of our software development, there might be instances where changes introduced in subsequent versions are not immediately reflected in this documentation. We encourage users to refer to the latest release notes and to use the feedback mechanism for any discrepancies or requests for clarification.
How to install the Pascal app in HubSpot
If you already have a Pascal environment, you need to make the HubSpot and Pascal connection from within the Integration settings in Pascal.
- Go to the App Marketplace in HubSpot.
- Search for Pascal in the search bar for apps.
- Click on the Pascal app in the search results.
- In the Pascal app marketplace page, click on the Install app button at the top right of the screen.
- If your HubSpot account is connected to multiple HubSpot environments, you will need to select the environment you would like to connect the Pascal app to.
- An overview is given of the app and the button Connect app at the bottom of the screen should be pressed to connect the app.
- Now, a window will open where you can create a Pascal environment

If you already have a Pascal account, you'll need to connect your HubSpot and Pascal environments from within the Integration settings in the Pascal application. - In this Signup form for Pascal, some information needs to be provided to create the Pascal environment to connect to HubSpot. A first name and last name need to be provided, the email address you would like to use with your account and the name of the Pascal environment you would like to use. There is also an option to choose for a free or paid organisation.
- Select the checkbox if you agree with the statement and click on the Create organisation button.
- Your Pascal environment is now created and linked to your HubSpot environment.
Add country property for contacts and companies
Result quality increases significantly when searching with a name and country. We highly recommend to add the country property for contacts and companies.
- Go to the Contacts page in HubSpot.
- Select the Create contact button.
- Click on Edit this form in the top right corner.
- Select Add properties in the left sidebar.
- Open the section Contact information.
- Select the checkbox Country/Region.
- The new field shows up in the preview of the contact form on the right. To reorder the fields drag the Country/Region field up, and let go just below Last name. This is useful as you can then quickly fill in the contact's first name, last name and country when adding a contact to your HubSpot environment.
- Optionally, you can make the field Country/Region required, so no one in your environment can forget to fill in this field. You can do this by selecting the * button while hovering over the field.
- Click on the Save button in the top right corner.
These steps can also be followed to add the country property to companies.
Enable notes for all users
When KYC checks are performed in HubSpot contacts or companies, notes of the results and a report about the check is added. It is useful to make sure that all users in HubSpot can see these results and the attached report.
Add or change the permission for users to view all notes in the HubSpot environment. If you are not sure how to do this, use the HubSpot documentation to achieve this.
If notes are not enabled for all users, users cannot see KYC check information in the notes from each other.
Move KYC check card
To make sure the KYC check card is monitored and visible in the HubSpot contact or company page, the card can be moved from the bottom of the right sidebar, to higher in the right sidebar.
Change this setting for both the Company and Contact pages.
View policy in Pascal
To make sure all users in HubSpot can see each other KYC checks and no duplicate checks are created, the view policy in Pascal should be changes so everyone can see all checks in the whole Pascal environment. To do this, follow the below steps:
- Go to the Pascal website by going to https://app.pascal.vartion.com/.
- Login to the application and click on Settings in the top right corner.
- Click on the Policies tab in the top of the screen.
- In the Cases card, make sure the Read rights is set to Organisation.
- If this isn't the case, change the Read rights to Organisation, scroll down to the bottom of the screen and select the Save button at the bottom.

Add KYC check properties to contact and company information
When you add the Pascal application to your HubSpot account, the KYC Risk and KYC Alerts properties are added to your system.
- The KYC Risk property indicates the risk found in the KYC checks done on your contacts and companies. It can also be overwritten by you if you do not agree with the risk given tot he entity in Pascal.
- The KYC Alerts property indicates the found alerts during the screening or continuous monitoring. If this number is higher than 0, it indicates that there are new items which require attention to determine if it are matches or false positives.
These properties can be added in general overviews to indicate details about the KYC checks.
In below steps will be explained how you can add these properties to the lists overviews of contacts and companies and how to add the property to a contact's page and company's page.
In the list overview of all your contacts and companies you can add the columns KYC Risk and KYC Alerts. To add these columns, follow the below steps:
- Click on the Contacts dropdown in the top left of the HubSpot window and click on Contacts or Comapnies.
- Inside the table in the top right corner, select the Actions button.
- Then choose for the Edit columns option.
- Here, numerous properties can be added to the contacts table overview. Search for KYC Risk and KYC Alerts.
- Check the checkbox to include the KYC Risk and KYC Alerts properties in your table overview.
- If you prefer, you can alter the order of the columns on the right side of the window by dragging a property up or down.
- Click on the Apply button when you are finished.
Another option is to add the KYC Risk and KYC Alerts properties to the contact details and company details pages in the About this contact section. To do this, follow the below steps:
- Click on the Contacts dropdown in the top left of the HubSpot window and click on Contacts.
- Inside the table, click on a contact to navigate to that contact's page.
- On the contact's or company's page, click on the Actions button in the About this contact and About this company section on the left side. Click on the Customize properties button.
- Select in the top of this new sidebar the option Add properties.
- Search in the search bar for KYC Risk and KYC Alerts and check the checkbox next to those properties.
- You can move the properties more to the top of the About this contact or About this company section by dragging them up.
- Select the Save button when you are done editing the left sidebar.
HubSpot tasks for KYC checks
Optionally a workflow can be set up to create KYC checks for contacts and companies meeting certain criteria. As an example, when a deal is added to a company a task can be created for the company owner to perform the KYC check.
To set this up, the below steps can be followed:
- Click on the Automations section of HubSpot and select the Workflows tab.
- In the top right, click on Create workflow and select From scratch.
- Select the workflow option Company based with the Blank workflow option and press Next.
- Click on the button Set up triggers and set up to trigger if a deal is attached to the company.
- Press Save when you have set up the trigger.
- Select the plus icon below the trigger, to set up the action if the criteria of the trigger are met.
- Create the action to create a task for the company owner to perform the KYC check.
You can set up the same workflow for the contact attached to the company and deal.
HubSpot tasks for high KYC Risk
Optionally a workflow can be set up to create a task for a company or contact owner when the KYC Risk of the company or contact is High or Very High.
To set this up, the below steps can be followed:
- Click on the Automations section of HubSpot and select the Workflows tab.
- In the top right, click on Create workflow and select From scratch.
- Select the workflow option Company based with the Blank workflow option and press Next.
- Click on the button Set up triggers and set up the trigger if the KYC Risk property has a value of High or Very High.
- Press Save when you have set up the trigger.
- Select the plus icon below the trigger, to set up the action if the criteria of the trigger are met.
- Create the action to create a task for the company owner to review the performed KYC check and take action.
You can set up the same workflow for the KYC Risk property in a contact.
HubSpot list for unscreened contacts or companies
Optionally, you can create a view which only includes contacts or companies which do not have a value in the KYC Risk or KYC Alerts property. This list can then be monitored to work though and create KYC checks for.
To set this up, the below steps can be followed:
How to set up HubSpot integration from within Pascal
This documentation, including images, videos and text, is accurate as of Version 5.12 of Pascal.
We strive to keep our documentation up to date with each release to ensure it remains a reliable resource for our users. However, given the dynamic nature of our software development, there might be instances where changes introduced in subsequent versions are not immediately reflected in this documentation. We encourage users to refer to the latest release notes and to use the feedback mechanism for any discrepancies or requests for clarification.
Creating an integration between your already existing Pascal environment and your HubSpot environment, can help you to keep track of all your clients and companies in your HubSpot environment. To create this connection from within Pascal can be done by following the following steps:

How other users can join your Pascal environment
This documentation, including images, videos and text, is accurate as of Version 5.12 of Pascal.
We strive to keep our documentation up to date with each release to ensure it remains a reliable resource for our users. However, given the dynamic nature of our software development, there might be instances where changes introduced in subsequent versions are not immediately reflected in this documentation. We encourage users to refer to the latest release notes and to use the feedback mechanism for any discrepancies or requests for clarification.
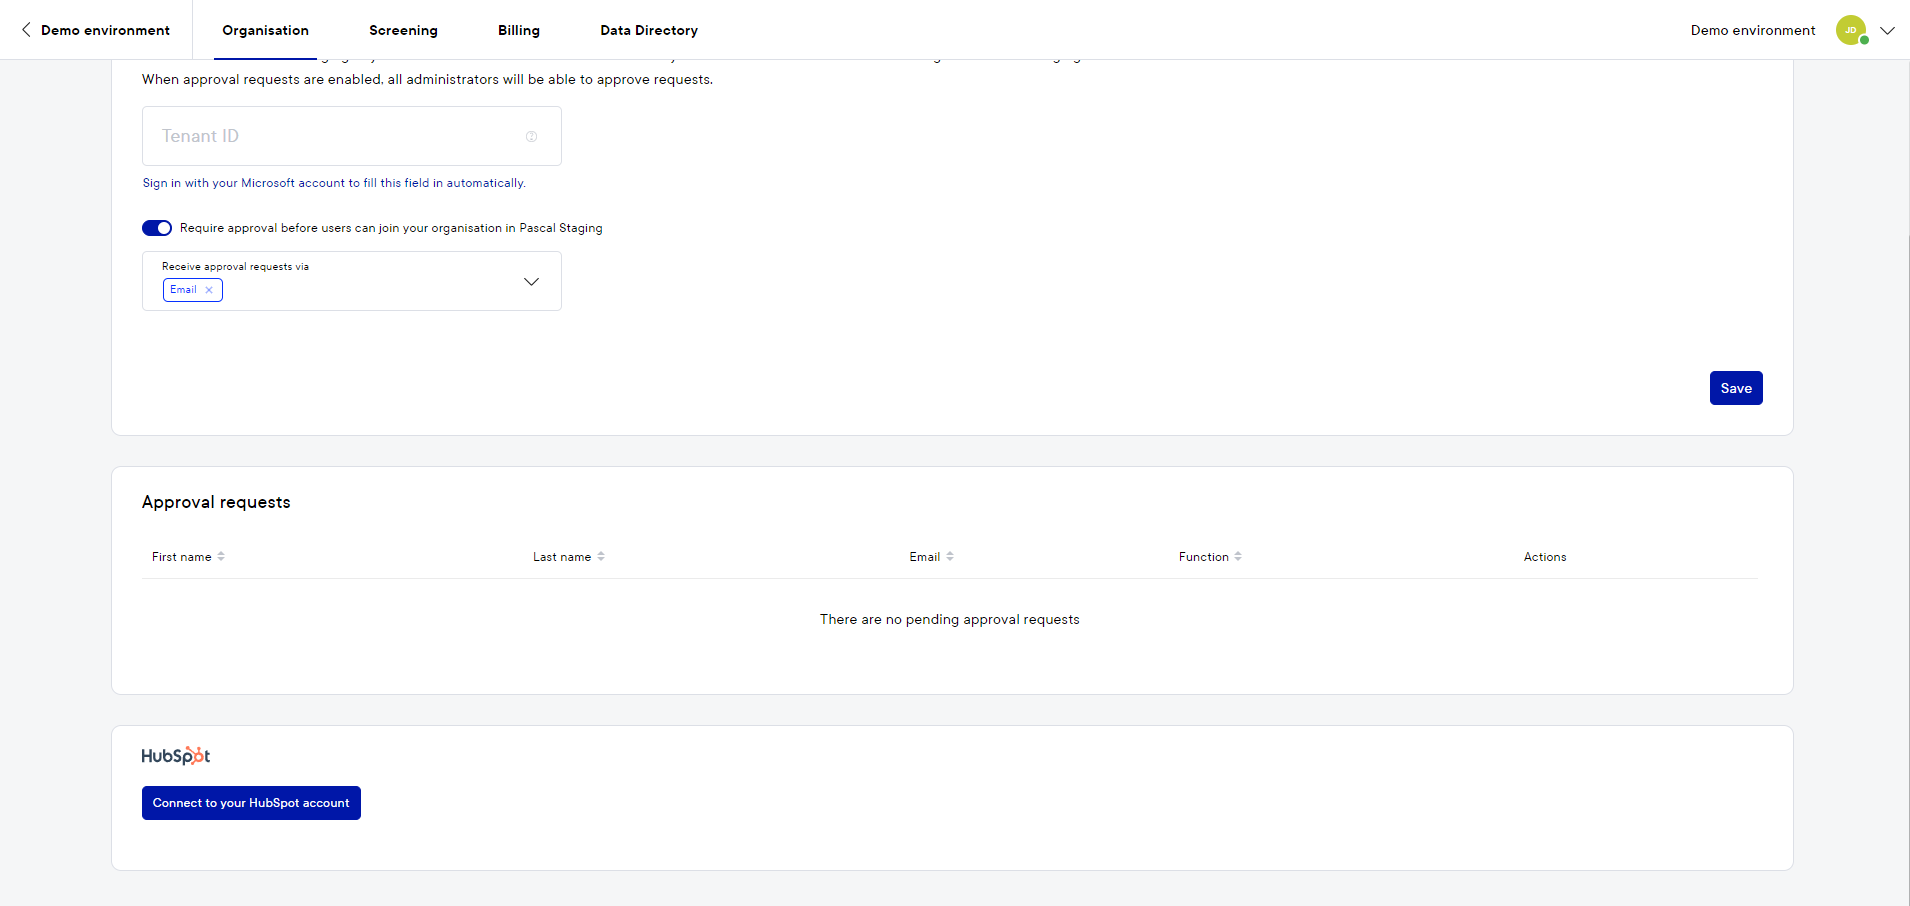
After the Pascal app is installed in your HubSpot environment, all users in your HubSpot environment can start using the KYC check functionality in contacts and companies in HubSpot.
When someone who does not yet have a Pascal account, opens a contact with a KYC check in it or creates a KYC check for a contact which does not have one yet, an account will automatically be created in Pascal for this person.
When the account is created, an activation email is sent to the email address associated to the HubSpot account. The activation code in this email can be used to activate your Pascal account after which the user can now go to the KYC checks created from HubSpot in Pascal as well.
If the activation code in the email is not used within two days, the activation code cannot be used anymore. If you would like to activate your account after this period, you can follow these steps:
- Press the Forgot password? button on the login screen of Pascal.
- Enter your email address and select the Reset button.
- An email will be sent to your email address.
- From this email, you can activate your account by setting a new password.
How to create a KYC check from within HubSpot
This documentation, including images, videos and text, is accurate as of Version 5.10 of Pascal.
We strive to keep our documentation up to date with each release to ensure it remains a reliable resource for our users. However, given the dynamic nature of our software development, there might be instances where changes introduced in subsequent versions are not immediately reflected in this documentation. We encourage users to refer to the latest release notes and to use the feedback mechanism for any discrepancies or requests for clarification.
With the Pascal app connected to your HubSpot environment, KYC checks can be initiated easily and even automated from within your HubSpot environment.
Automatic KYC checks
KYC checks can automatically be performed when a new contact or company is added to your HubSpot environment.
This setting is turned on by default, and can be turned on or off with the following steps:
- With the correct permissions in HubSpot, navigate to the settings in HubSpot by selecting the settings wheel icon in the top right corner.
- In the left navigation menu select under Integrations the page Connected Apps.
- Here, the Pascal app will be displayed between potential other apps. Press the Actions button in the Pascal app card and click on the Go to settings button there.
- The settings of the Pascal app will show up. Here, the setting Automatic KYC Checks is present. Click on the toggle on the right side to turn this functionality on or off. When the toggle is green with a checkmark in it, automatic KYC checks is turned on.

When this setting is turned off, new contacts and companies added to HubSpot will not automatically get KYC checks. However, these KYC checks can still be initiated manually from within the contact or company from within HubSpot.
How to perform a manual KYC check on a contact or company
A KYC check can be initiated manually if desired in a contact or company from within HubSpot.
This can be done by:
- Navigate to the HubSpot contact you would like to create a KYC check for.
- In the side bar on the right, the section KYC Check is visible due to the Pascal app installed in your HubSpot environment.
- In the KYC Check section, press the Create case button.
- The message Create case succeeded will show up at the top of the page. Additionally, the KYC Check card will now display the created case.
- However, the case is still searching for potential results. To see if the search is done, the button Refresh (search can take up to 2 minutes) can be pressed.
- After the case is done searching and the refresh button is pressed after the search was completed the status, results and risk will be visualised from the case. A note is also added to the contact or company about the found results.

If you would like to view the found results and verify the found hits, you can click on the contact or company's name in the KYC check card, this will open Pascal in a new page. If you are not already logged in to Pascal, you will see the login page of Pascal. After logging in, you can view the case created from the HubSpot contact or company.
KYC check in contact with the automatic KYC setting turned on
A KYC check is initiated automatically when the setting for automatic KYC checks is turned on. When a new contact or company is created, a KYC check will be created as well.
Existing cases from before the automatic KYC setting was turned on, will not automatically get a KYC check. If you would like to create a KYC check in those contacts or clients, you can initiate it manually by selecting the Create case button manually.
How the KYC risk works in HubSpot checks
This documentation, including images, videos and text, is accurate as of Version 5.10 of Pascal.
We strive to keep our documentation up to date with each release to ensure it remains a reliable resource for our users. However, given the dynamic nature of our software development, there might be instances where changes introduced in subsequent versions are not immediately reflected in this documentation. We encourage users to refer to the latest release notes and to use the feedback mechanism for any discrepancies or requests for clarification.
A KYC check can be performed on the contact's or company's page.

When a search is performed, results are presented in the KYC Check card, displayed in the information section on the right side of the screen. Additionally, the results are added as a note in the Activity and Notes sections of the contact's or company's page in HubSpot.
All hits that have been found are summed up in the notes and results sections. Results can be found in the following sources:
- Sanctions
- Enforcements
- PEPs
- Business
- Media
- Other
These results can have different risk levels. Based on the risk of Pascal hits can be deemed Very high risk, High risk, Moderate risk, Low risk and Very low risk.
The highest found risk in the results which are unresolved or included is presented in HubSpot.
Unresolved, included and excluded hits
If results for a company or contact need more attention to verify if they are indeed relevant for your search, the link to the KYC check in Pascal can be used. By pressing the name in the top of the KYC Check card, you are directed to the Pascal application where you can view the details of all results found.

While on the KYC Check's case page, the same results are shown as in the HubSpot contact's page.

By pressing the Start resolving button, the results will be displayed and each hit found can be expanded to view the details of the hit.

When hits that have been found are not the contact you were searching for, the hits can be excluded by pressing the cross marked button on the right side of the hit. If a result found is the contact you were looking for, the hit can be included by selecting the check marked button on the right side of the hit.
The Risk displayed in the HubSpot contact page, is based on included and unresolved hits in the Pascal case.
Dive into KYC results
This documentation, including images, videos and text, is accurate as of Version 5.10 of Pascal.
We strive to keep our documentation up to date with each release to ensure it remains a reliable resource for our users. However, given the dynamic nature of our software development, there might be instances where changes introduced in subsequent versions are not immediately reflected in this documentation. We encourage users to refer to the latest release notes and to use the feedback mechanism for any discrepancies or requests for clarification.
If results for a company or contact need more attention to verify if they are indeed relevant for your search, the link to the KYC check in Pascal can be used. By pressing the name in the top of the KYC Check card you are directed to the Pascal application where you can view the details of all results.
While on the KYC Check's case page, the same results are shown as in the HubSpot contact's page.
By pressing the Start resolving button, the found results will be displayed and each found hit can be expanded to view the details of the hit.
When hits that have been found are not the contact you were searching for, the hits can be excluded by pressing the cross marked button on the right side of the hit. If a result found is the contact you were looking for, the hit can be included by selecting the check marked button on the right side of the hit.
Review KYC reports
This documentation, including images, videos and text, is accurate as of Version 5.10 of Pascal.
We strive to keep our documentation up to date with each release to ensure it remains a reliable resource for our users. However, given the dynamic nature of our software development, there might be instances where changes introduced in subsequent versions are not immediately reflected in this documentation. We encourage users to refer to the latest release notes and to use the feedback mechanism for any discrepancies or requests for clarification.
In the Activities tab on the contact's or company's page the found results are shown in the notes. These notes are automatically added to the contact's page after the search in Pascal has been performed.
At the bottom of the note about the KYC Check results a PDF file with the results is added as well.
When clicking this report and selecting the download button, the report will be downloaded by HubSpot. In this report, the following information can be found:
- General information of the KYC check.
- Settings of your Pascal environment which can affect the results found.
- The key findings of the performed search.
- All results of the KYC check.
Details of the results are also included in this document. However, these results can also be viewed by going to the results in the Pascal application. An explanation on how to do this is described here.