How to import cases in Pascal
This documentation, including images, videos and text, is accurate as of Version 5.12 of Pascal.
We strive to keep our documentation up to date with each release to ensure it remains a reliable resource for our users. However, given the dynamic nature of our software development, there might be instances where changes introduced in subsequent versions are not immediately reflected in this documentation. We encourage users to refer to the latest release notes and to use the feedback mechanism for any discrepancies or requests for clarification.
To import multiple cases into Pascal at once, you can upload a CSV, Excel or JSON file with the cases. Which makes converting existing cases into Pascal much easier.
Only users with owner or admin rights can perform the action to import cases.
- Click on your initials in the top right corner.
- Select Settings next to the environment name.
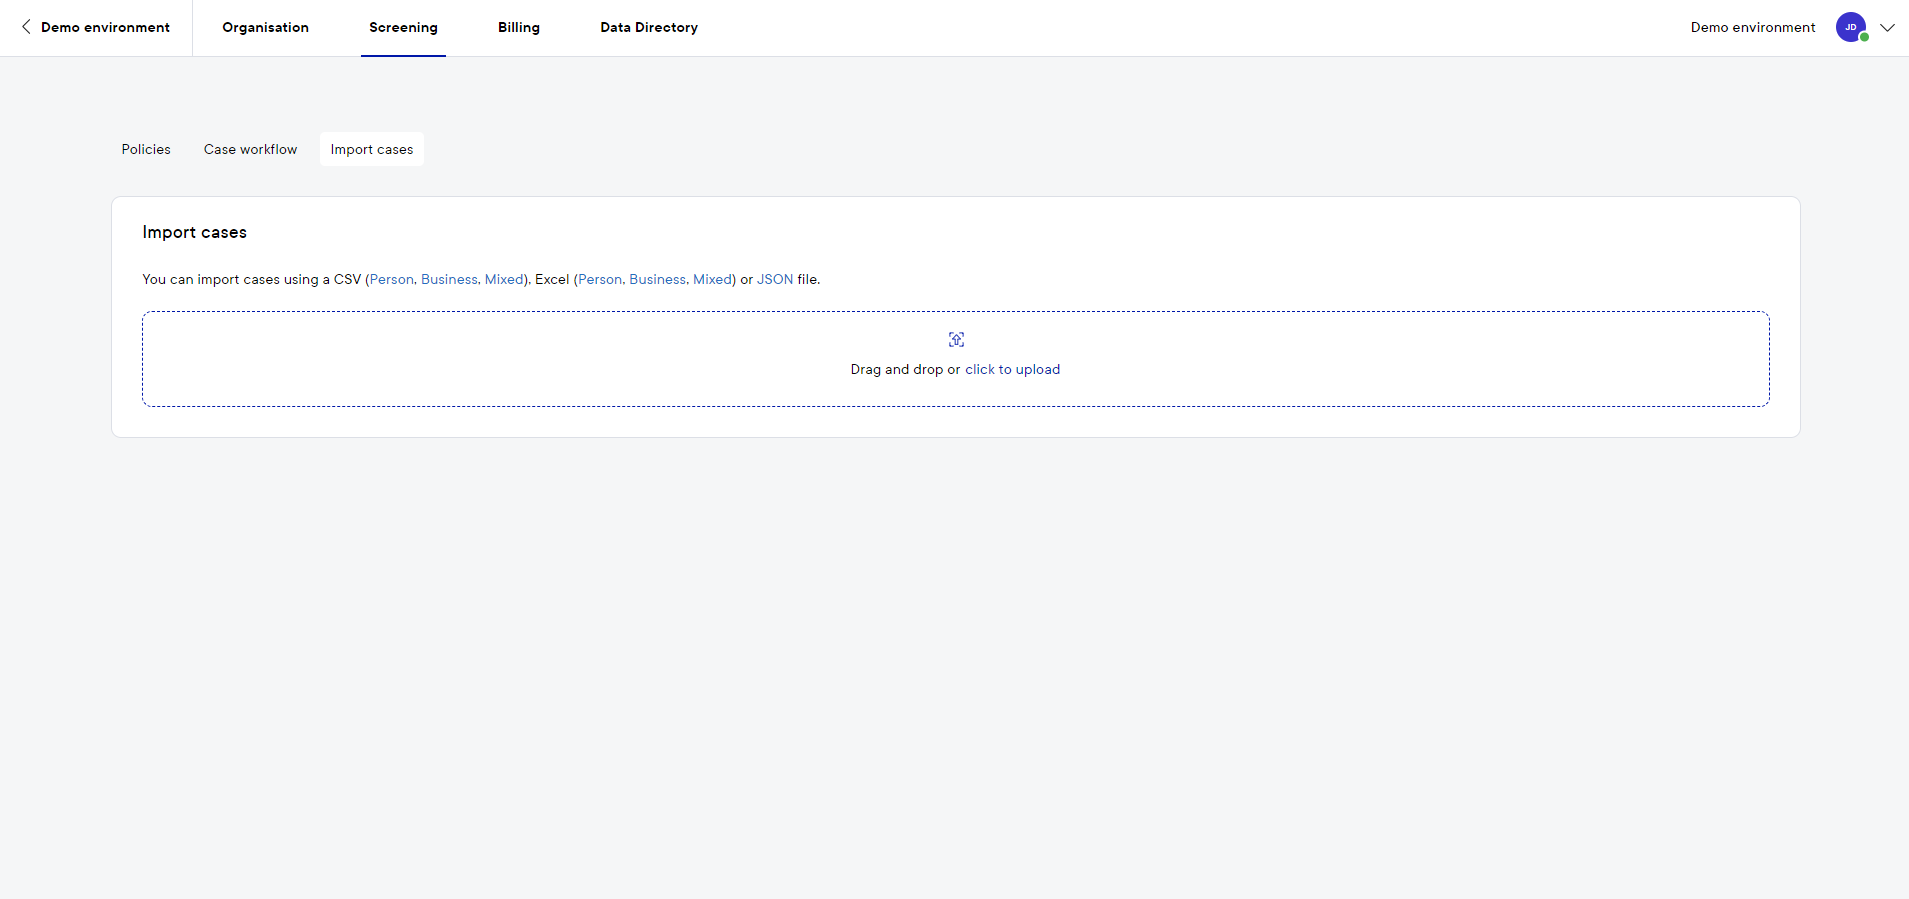
- Click on the Screening tab and open the Import cases page.
- On the Import cases page, you can get a template file for case importing. If you have an existing file, you can upload it into the designated area by dragging the file in that area or selecting the file in your file explorer after clicking on click to upload.
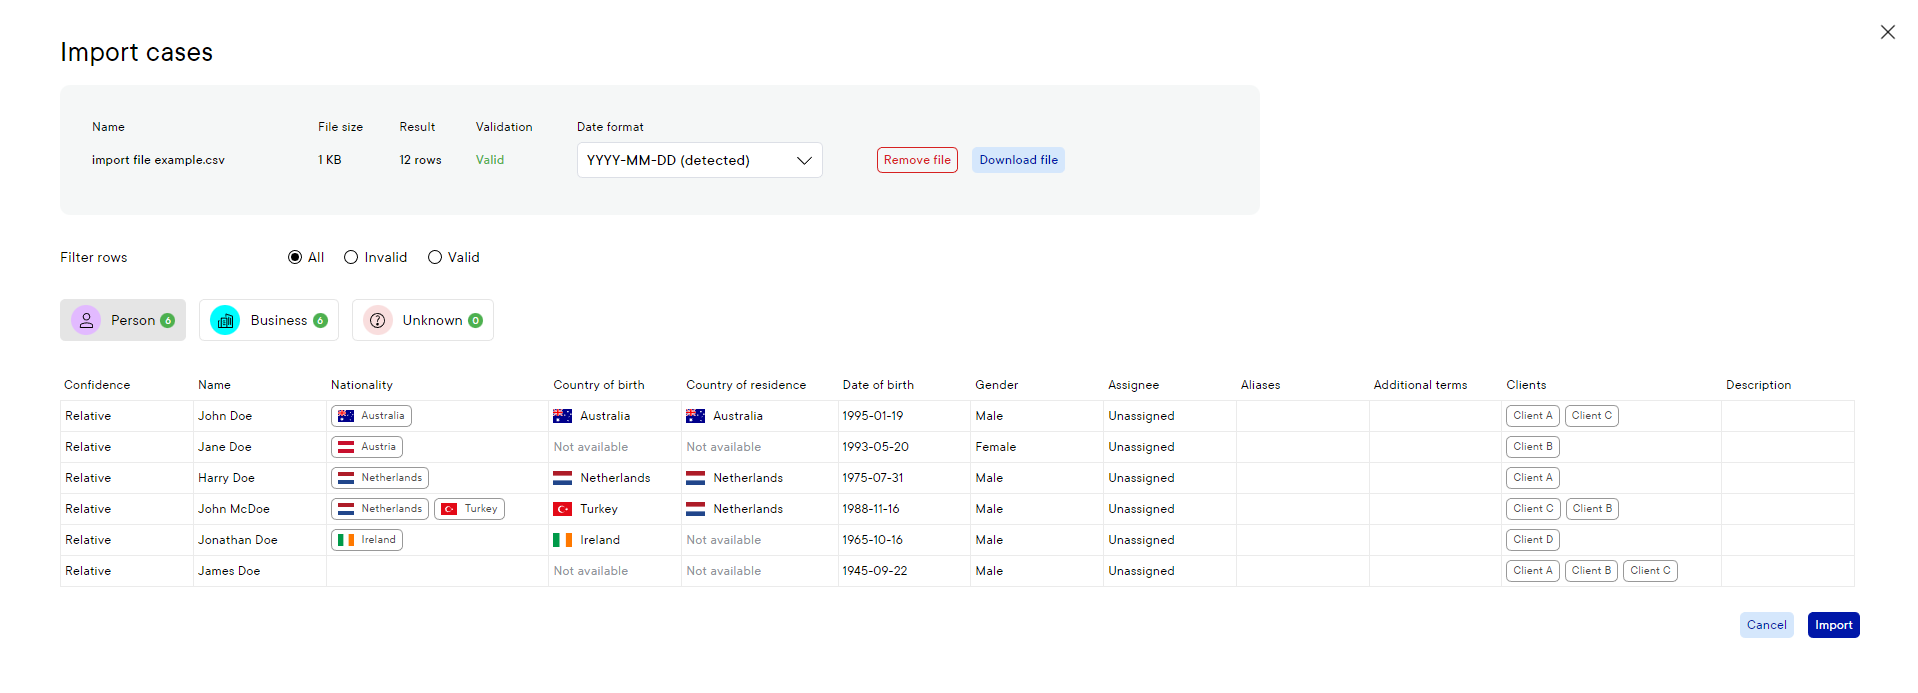
- The cases from the file are presented in the interactive table. The cases are assessed by automatic validation. If there are rows with invalid values, you can select those rows using the Filter rows selector above the table. You can review the cases and make final adjustments before uploading them into the account.
- Values can be changed directly in the table and replaced at once for multiple rows.
- There are dropdowns for multiple columns, where you can select a value directly from the list.
- The date format can be adjusted if needed.

- If all displayed information is correct, you can click on the Import button.
When large files are being imported, it can take some time before the system is done with the import.

