How to set up Microsoft Azure integration
This documentation, including images, videos and text, is accurate as of Version 5.12 of Pascal.
We strive to keep our documentation up to date with each release to ensure it remains a reliable resource for our users. However, given the dynamic nature of our software development, there might be instances where changes introduced in subsequent versions are not immediately reflected in this documentation. We encourage users to refer to the latest release notes and to use the feedback mechanism for any discrepancies or requests for clarification.
Microsoft Azure integration can greatly speed up the onboarding process of new users in your Pascal organisation. This feature enables the possibility to use the single sign-on button on the login page.
Setting up Microsoft Azure
In your company's Azure environment several settings need to be configured before Microsoft Azure can be configured in Pascal.
- Within your own Azure environment navigate to User settings.
- In the section enterprise application settings, a toggle can be found. Either one of two options need to be turned on: Users can consent to apps accessing company data on their behalf or Users can request admin consent to apps they are unable to consent to.
Adding a Tenant ID to Pascal
Furthermore, a Tenant ID needs to be added to your Pascal organisation. Only admins and owners can access submit a Tenant ID. To add your Tenant ID to Pascal, follow the following steps.
- Click on your initials in the top right corner.
- Select Settings besides your Pascal environment's name.
- Navigate to the Integrations page in the Organisation section.
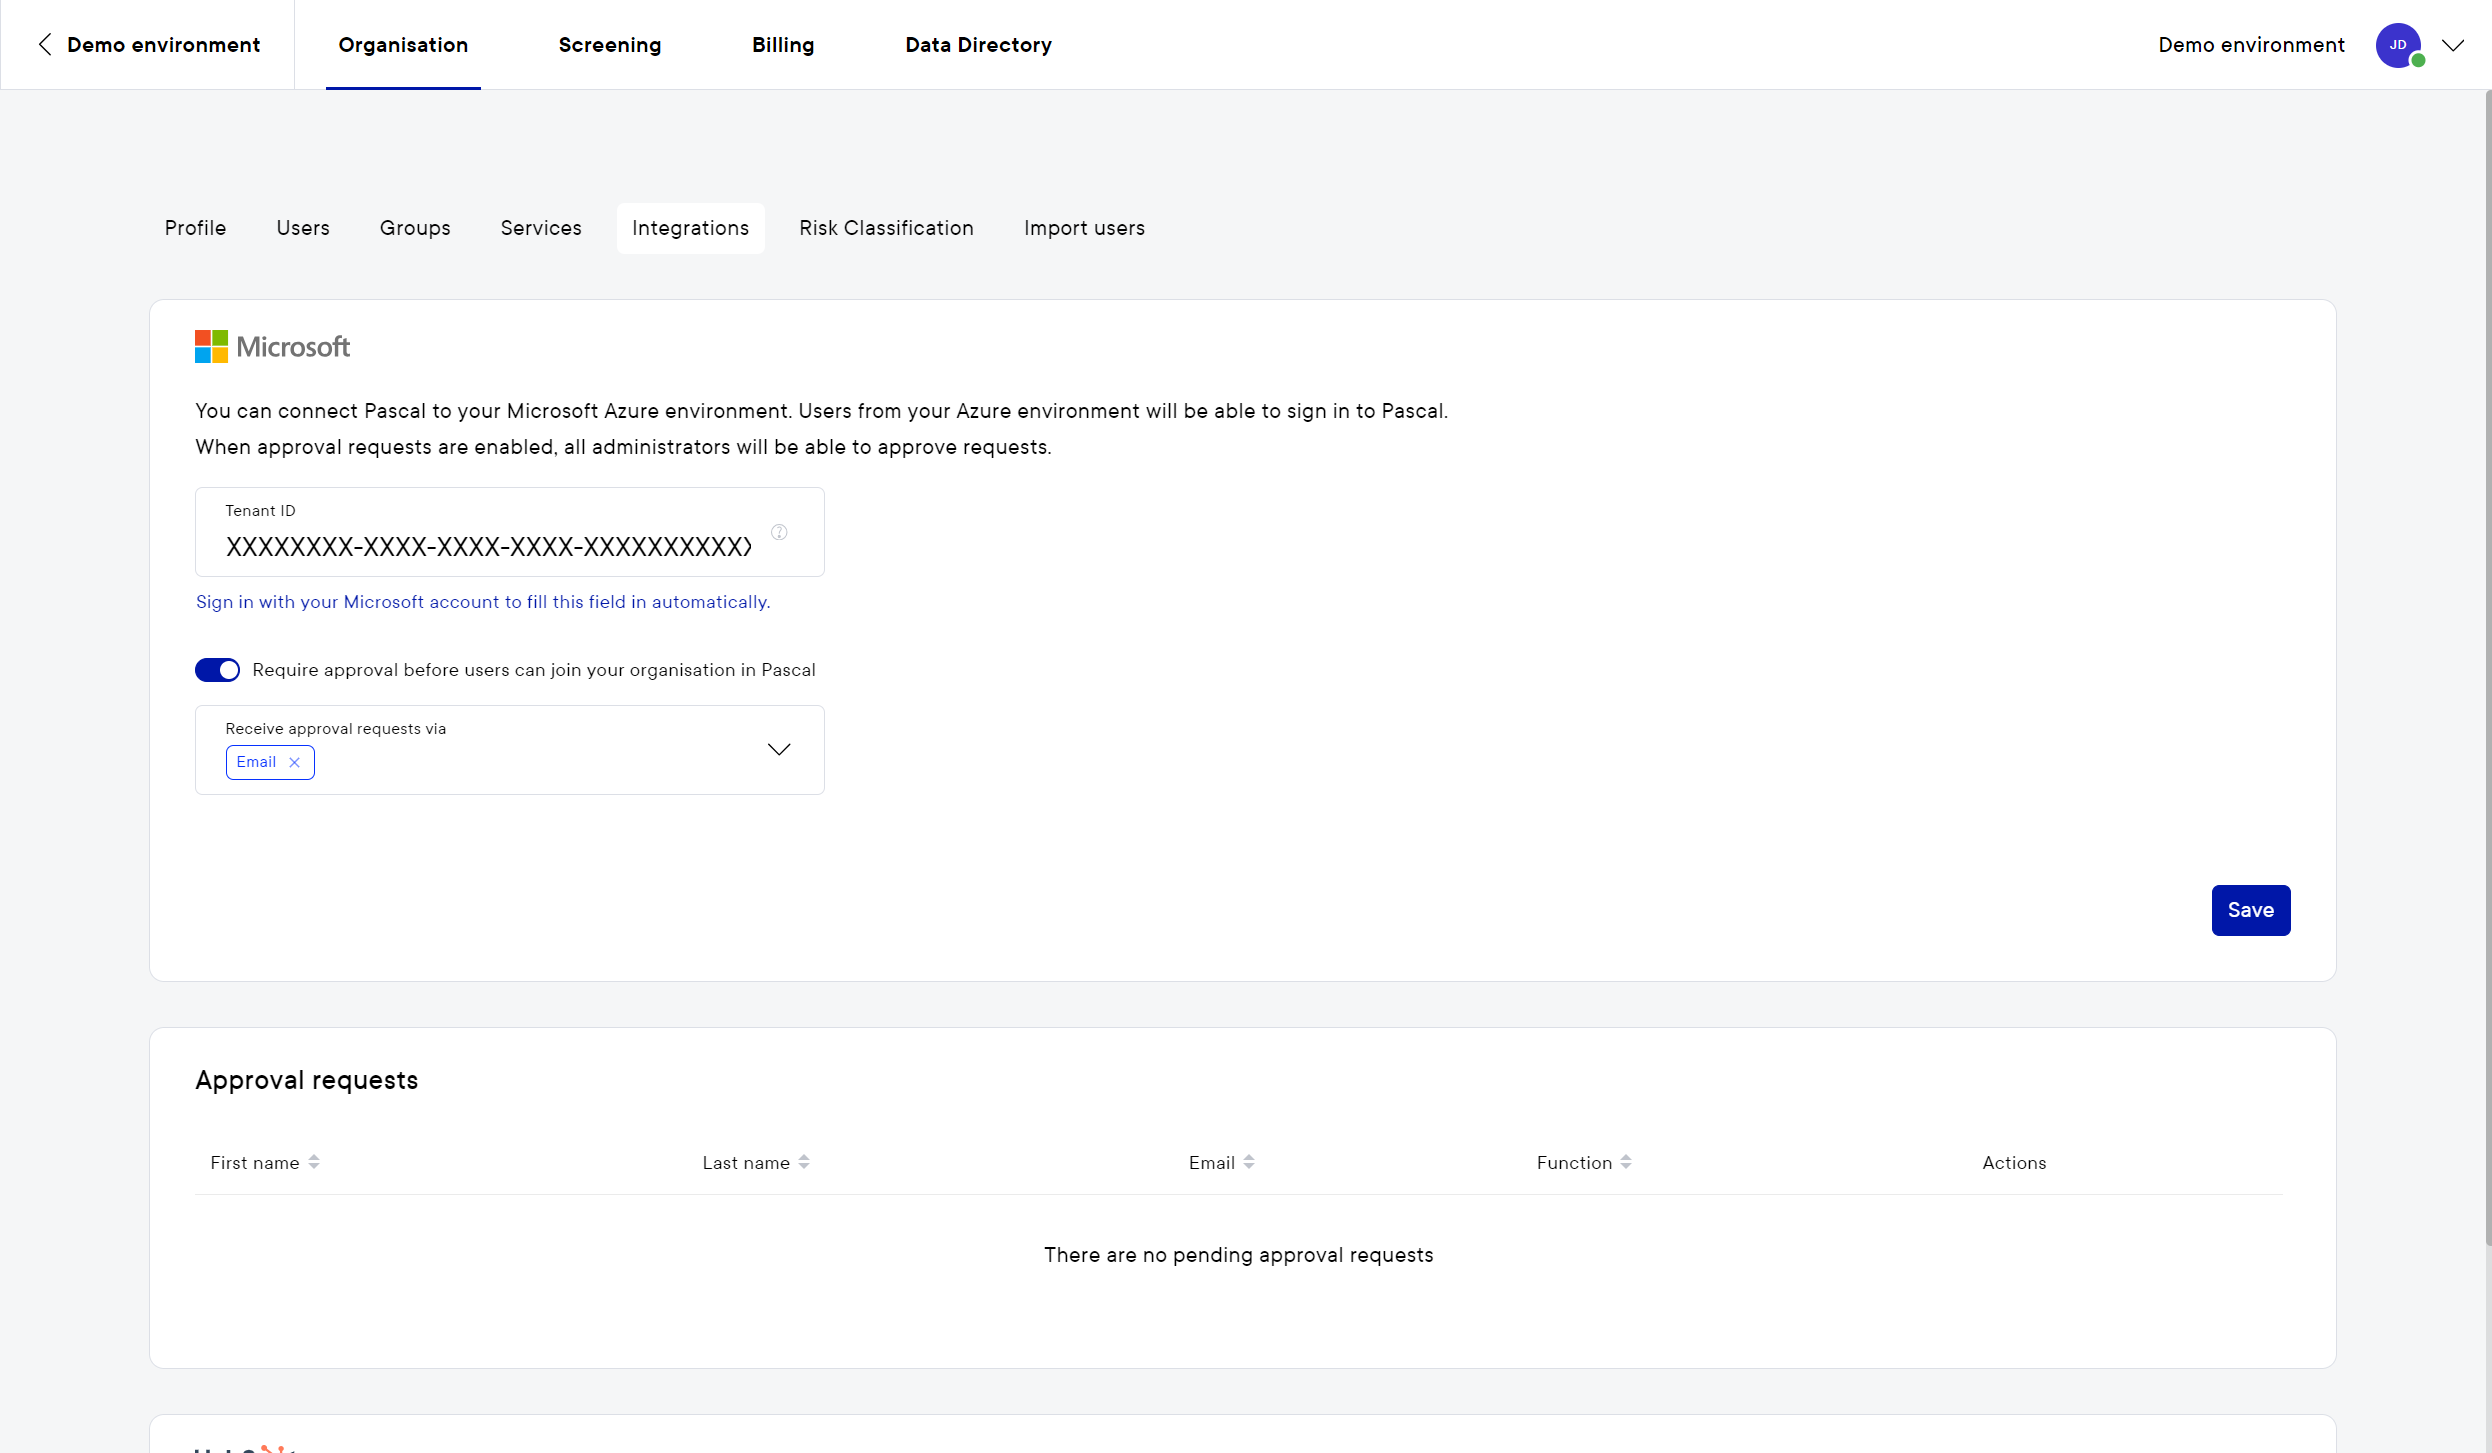
- Insert the Tenant ID in the field Tenant ID or press Sign in with your Microsoft account to fill this field in automatically.
Approval workflow for new users
It is possible to first review which employees would like access to Pascal. Within the Integrations turn on the feature Require approval before users can join your organisation in Pascal. Users who sign in with Microsoft Azure will now first need to be approved before their account is active. An email is sent out to all admins and owners stating an approval needs to be given.
Approving users
- Click on your initials in the top right corner.
- Select Settings besides your Pascal environment's name.
- Navigate to the Integrations page in the Organisation section.
- Under the section Approval requests each user that requested access is shown. A user can be accepted by pressing the check button or rejected by pressing the cross button.

